Configure a custom action
The first step with custom actions is to open the visual widget configurator and select “Custom action” as action type. Now you need to set a name for your custom action. Choose any name you like (it’s however important that this name matches the name you check in the next step).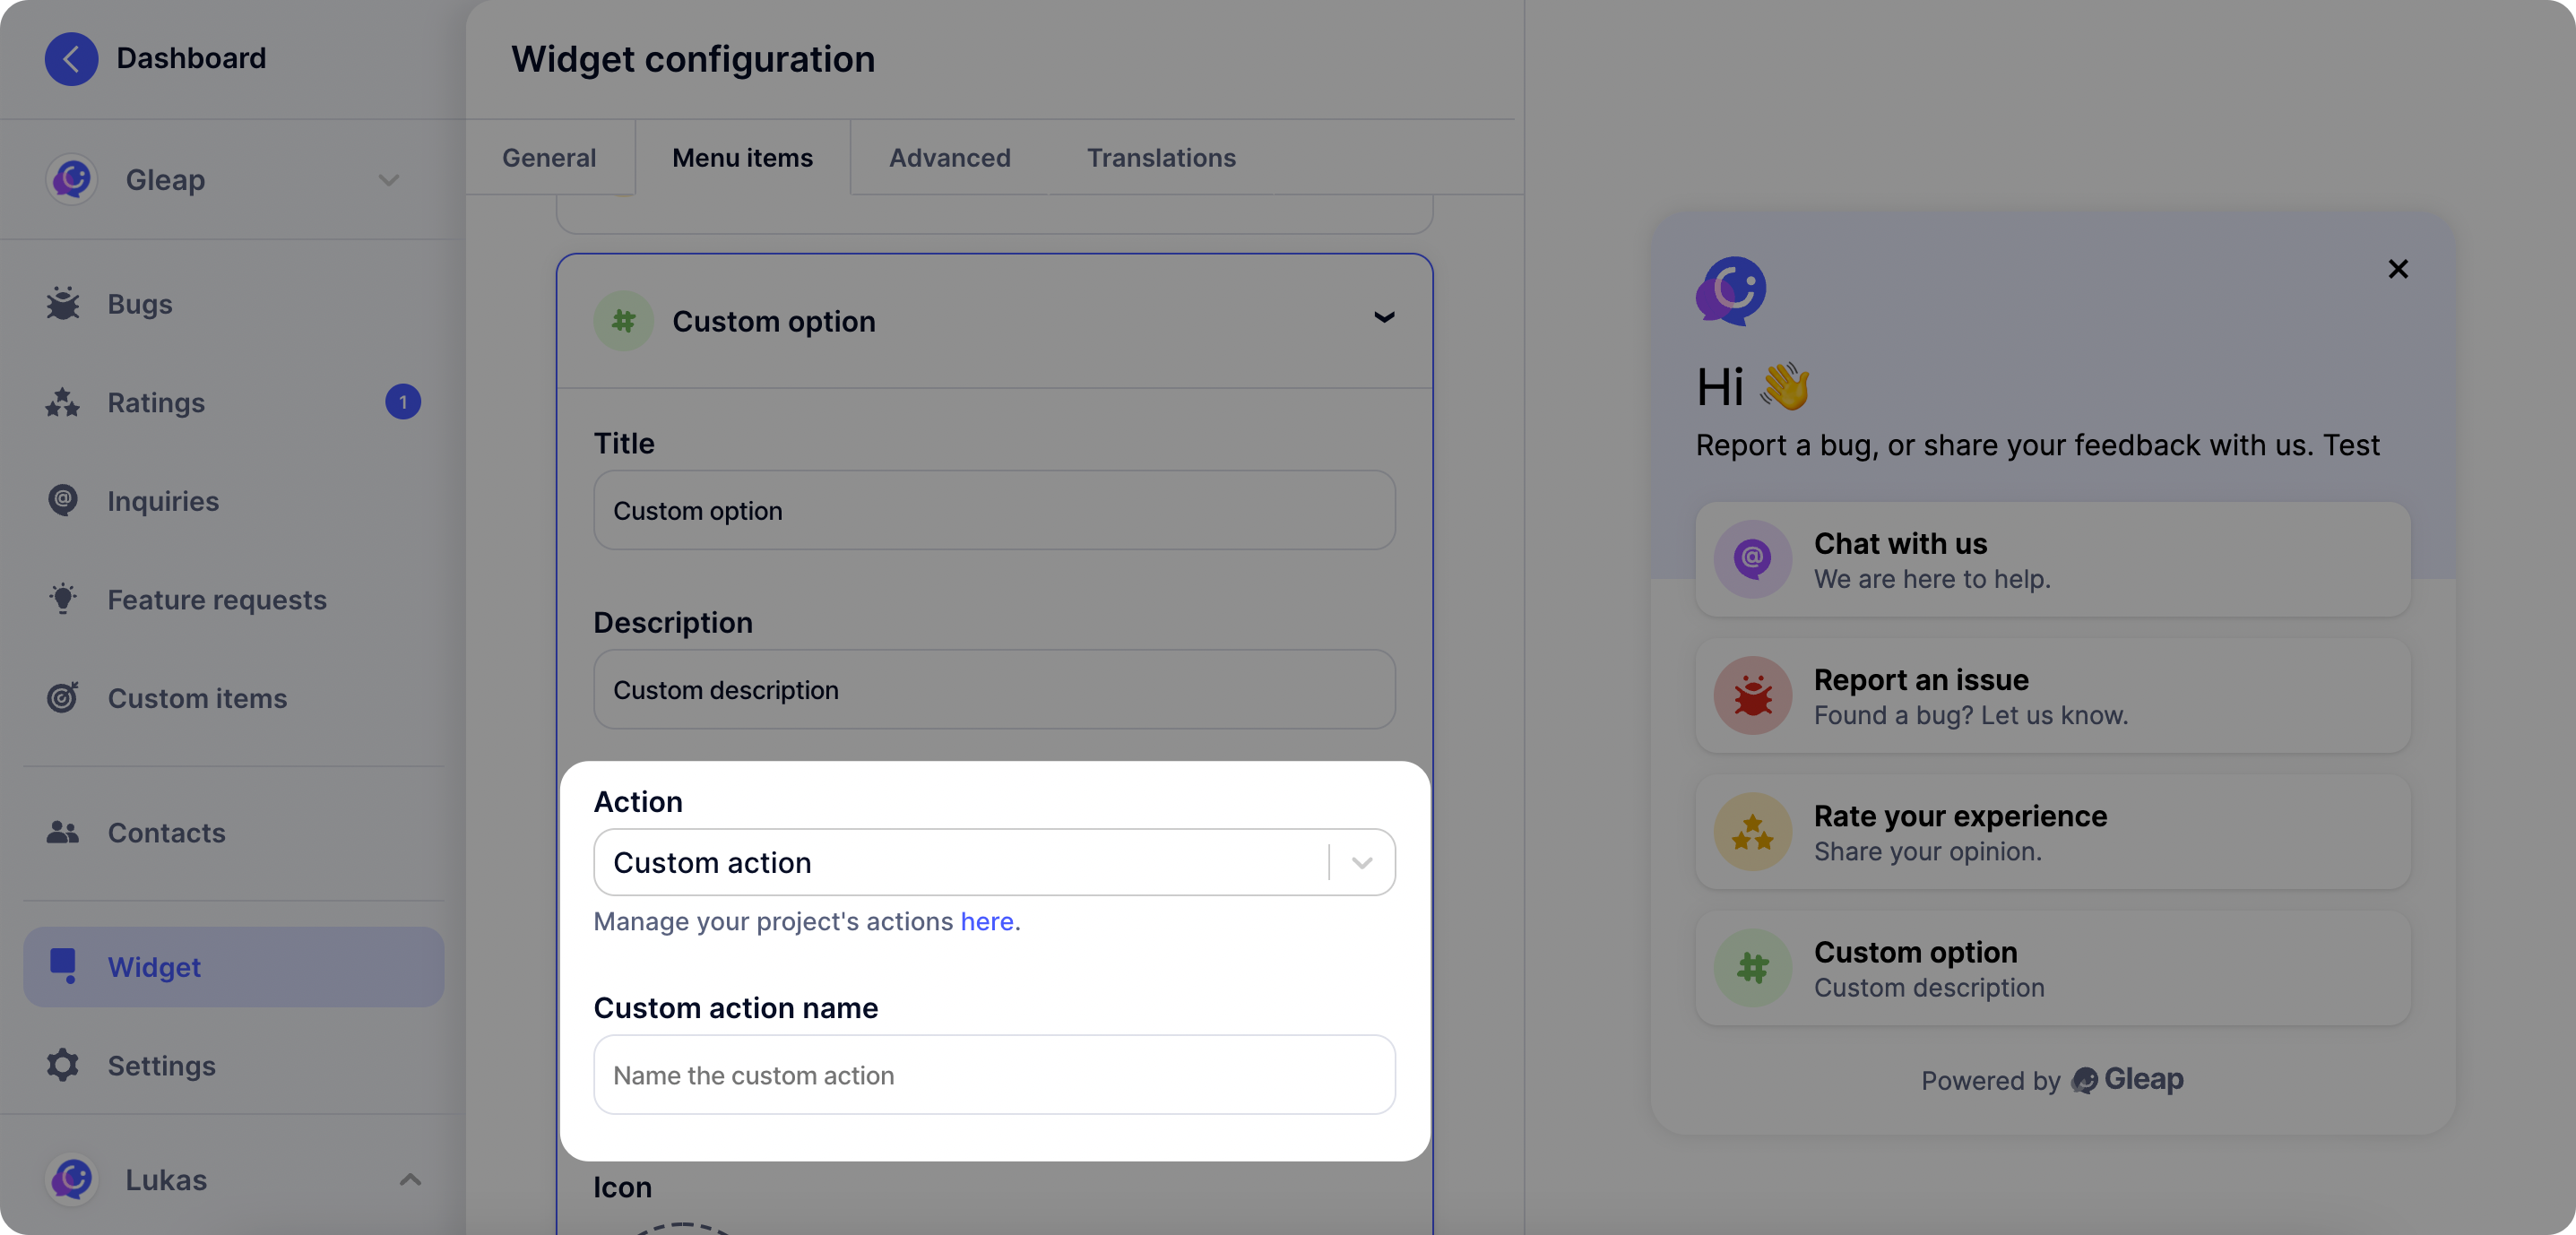
Custom action callback
Once you’ve set a custom action in the Gleap dashboard, it will be called automatically on selection through the user. In order to perform custom code, simply implement ourregisterCustomAction to receive the custom action events.
Add & implement the Gleap delegate
The following code sample shows how to implement theregisterCustomAction protocol.
The custom action name is defined by you in the visual widget configurator
on the Gleap dashboard.