> ## Documentation Index
> Fetch the complete documentation index at: https://docs.gleap.io/llms.txt
> Use this file to discover all available pages before exploring further.
# Push notifications
Stay connected with your customers by utilizing push notifications to alert them of new chat messages, release notes, and news articles. This will deepen engagement and foster stronger relationships.
Gleap supports Firebase Cloud Messaging to send push notifications to users.
## Setup Firebase Cloud Messaging
To make use of Gleap Push Notifications you must add the Firebase Cloud Messaging service to your app or website. Learn how to get started with FCM here.
## Getting your Firebase Cloud Messaging Token
Open your project in Firebase and open the project settings.
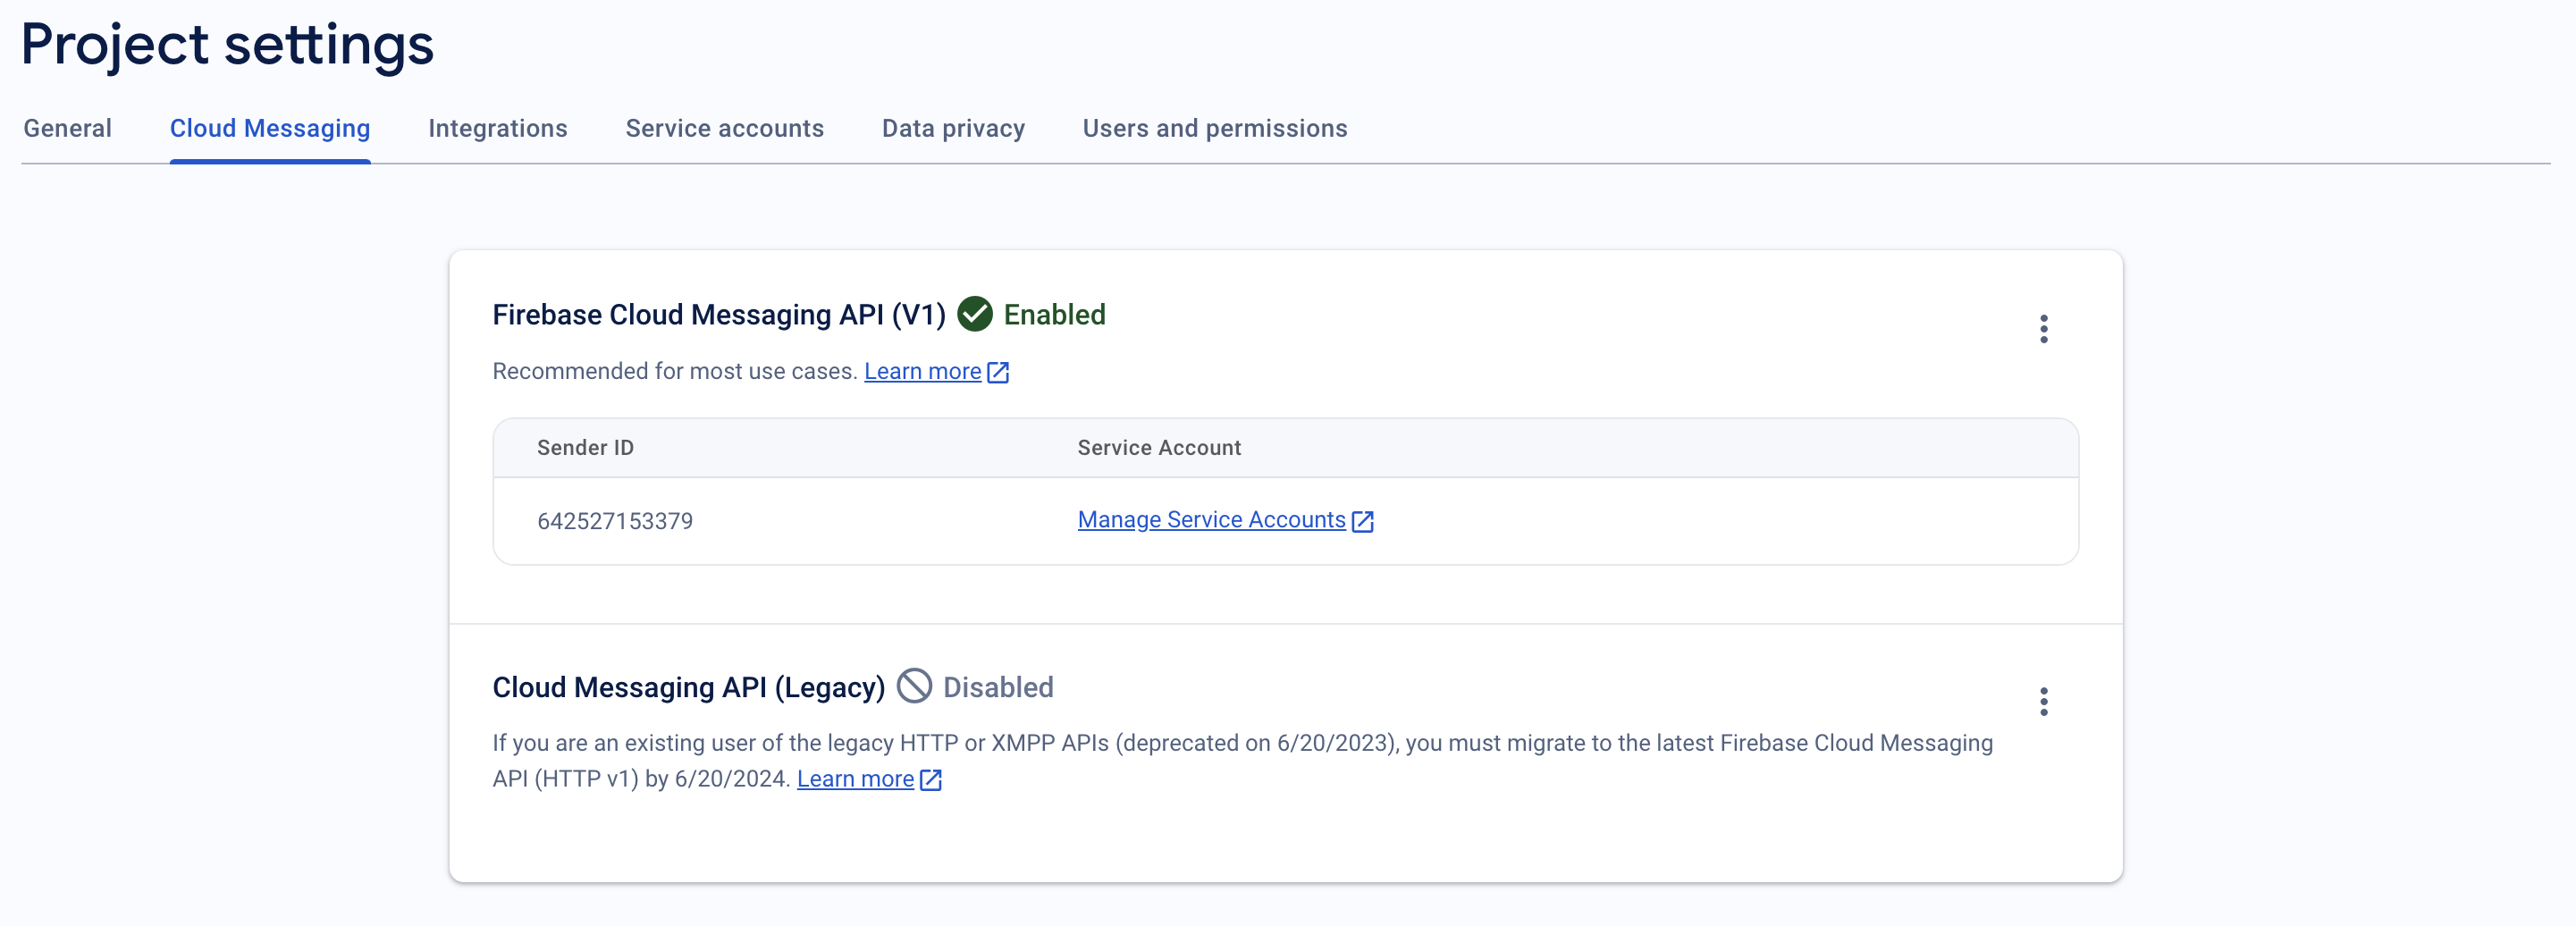
Click on "Cloud Messaging" and, if it is not already enabled, activate the Firebase Cloud Messaging API (V1).
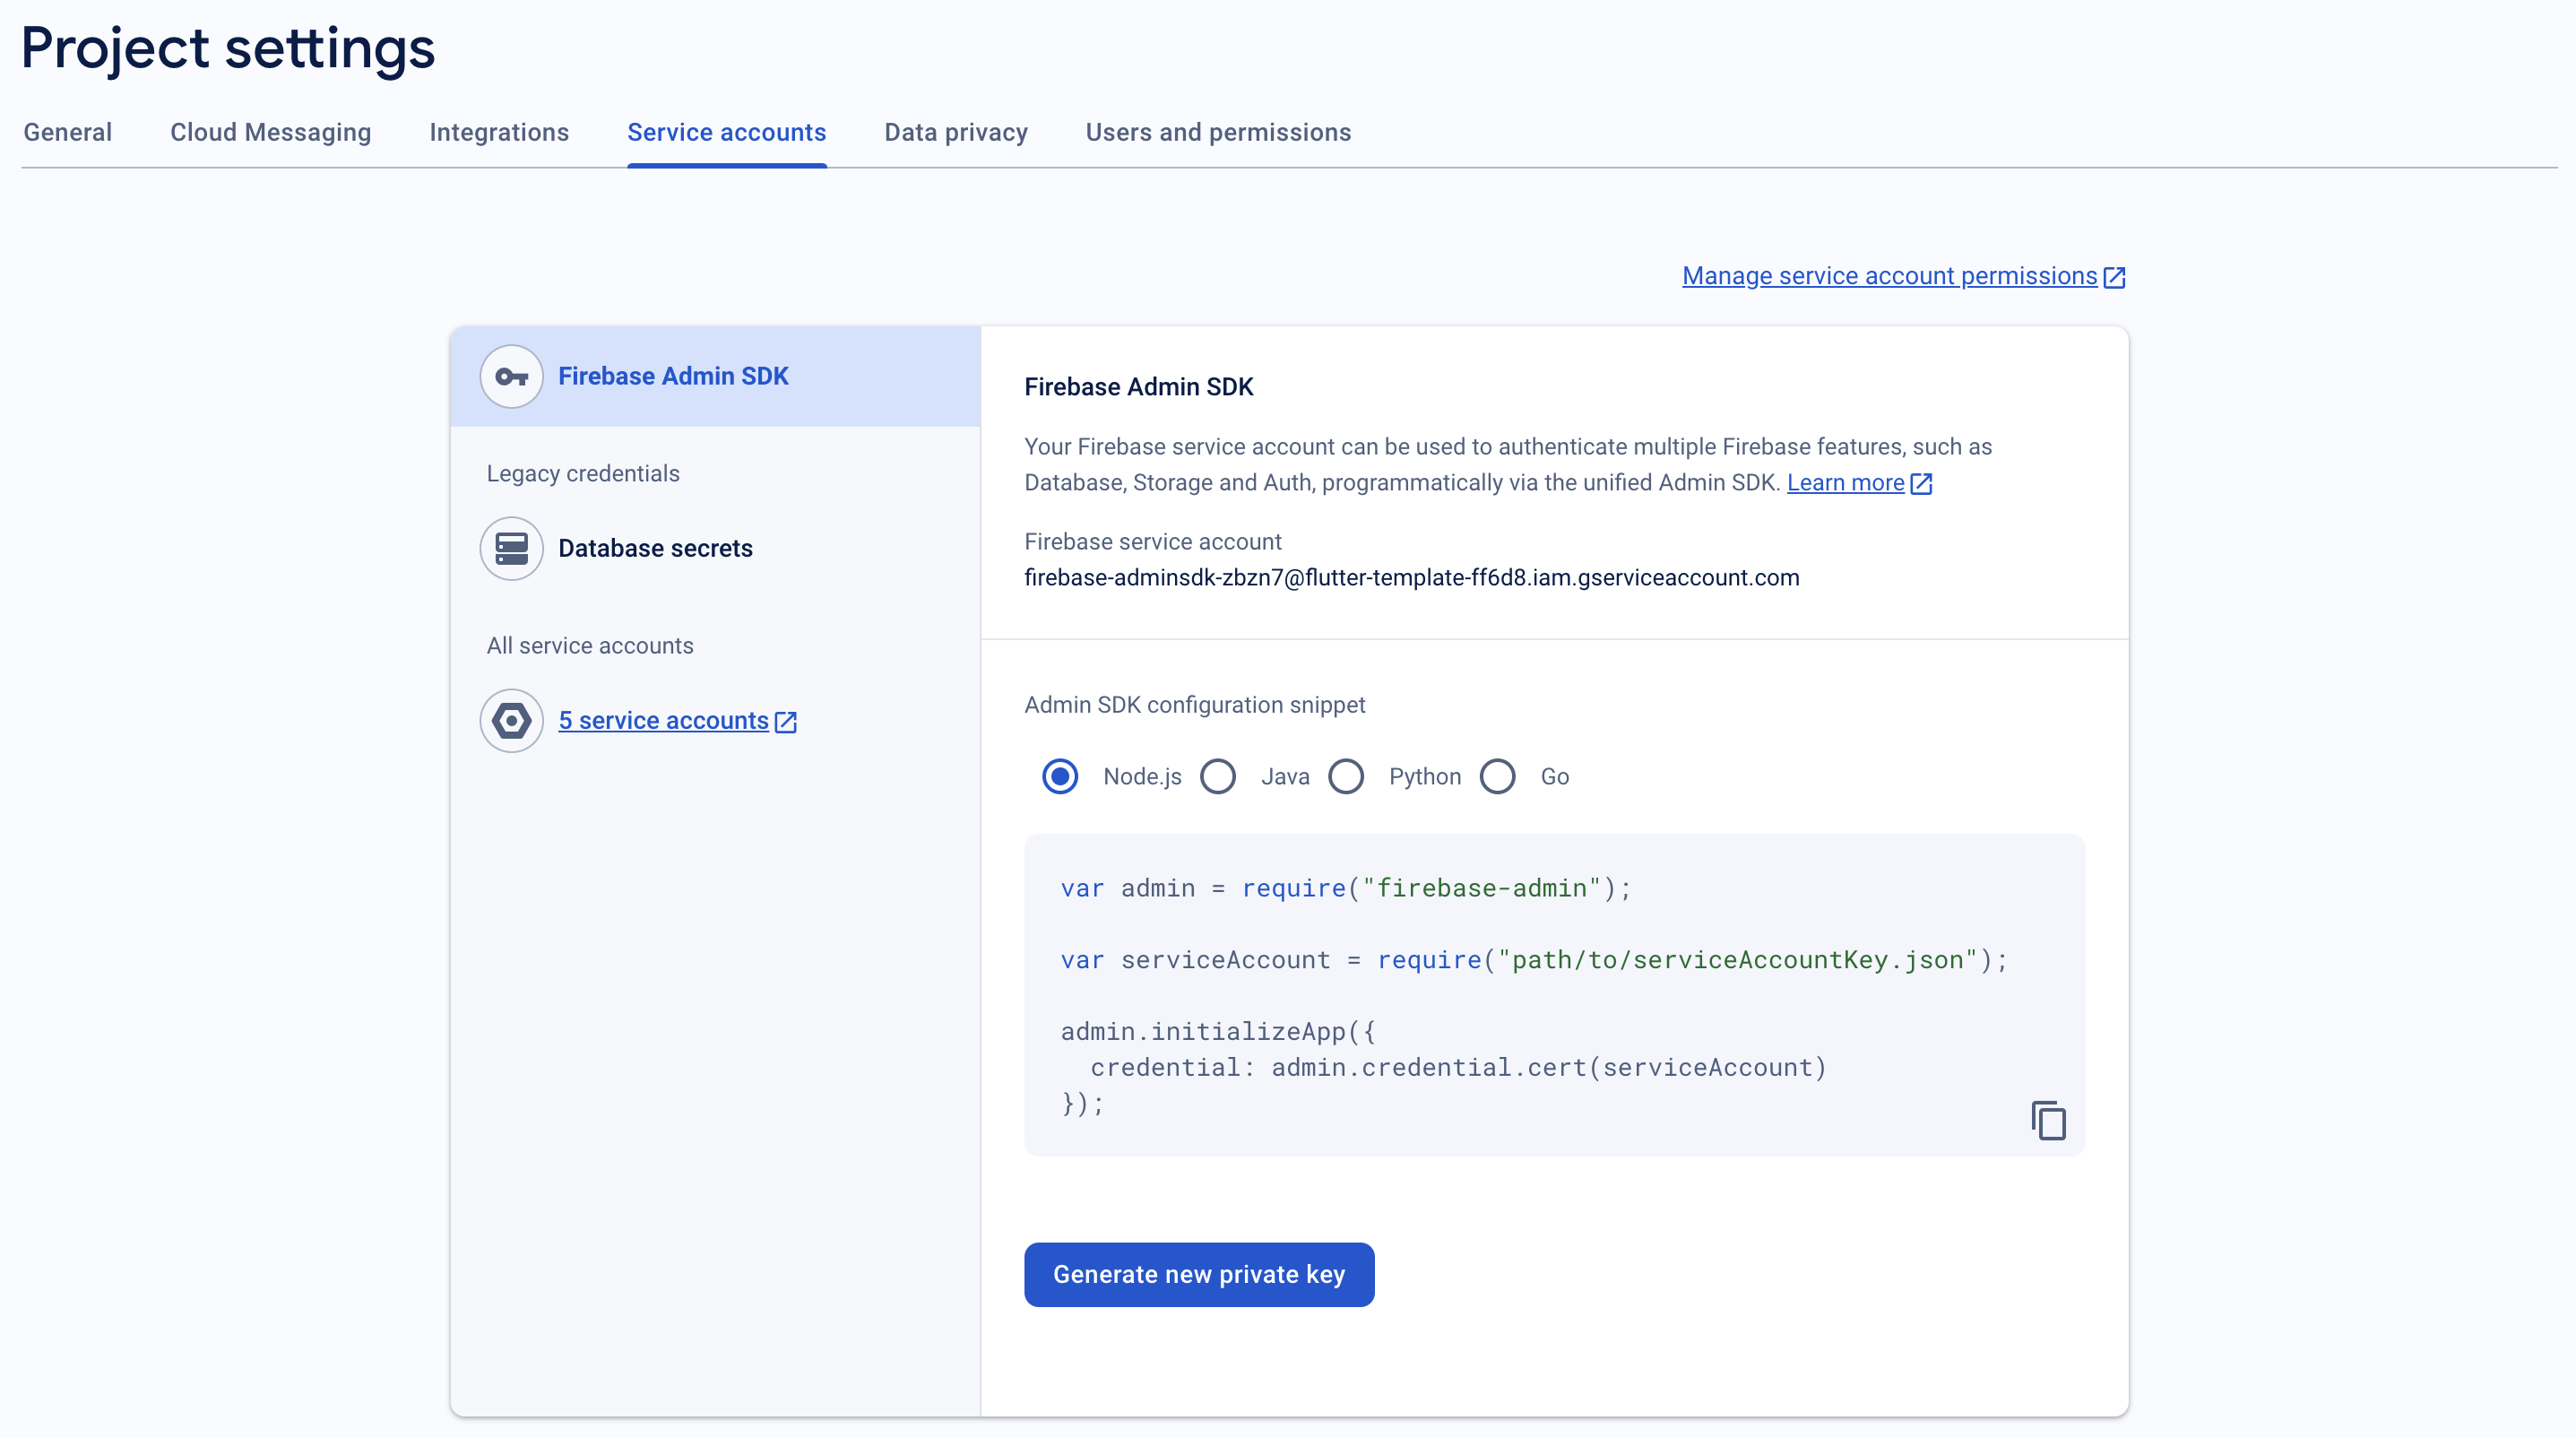
 Proceed to the "Service Accounts" section and generate a new private key, which will automatically create a file named like `serviceAccountKey.json`.
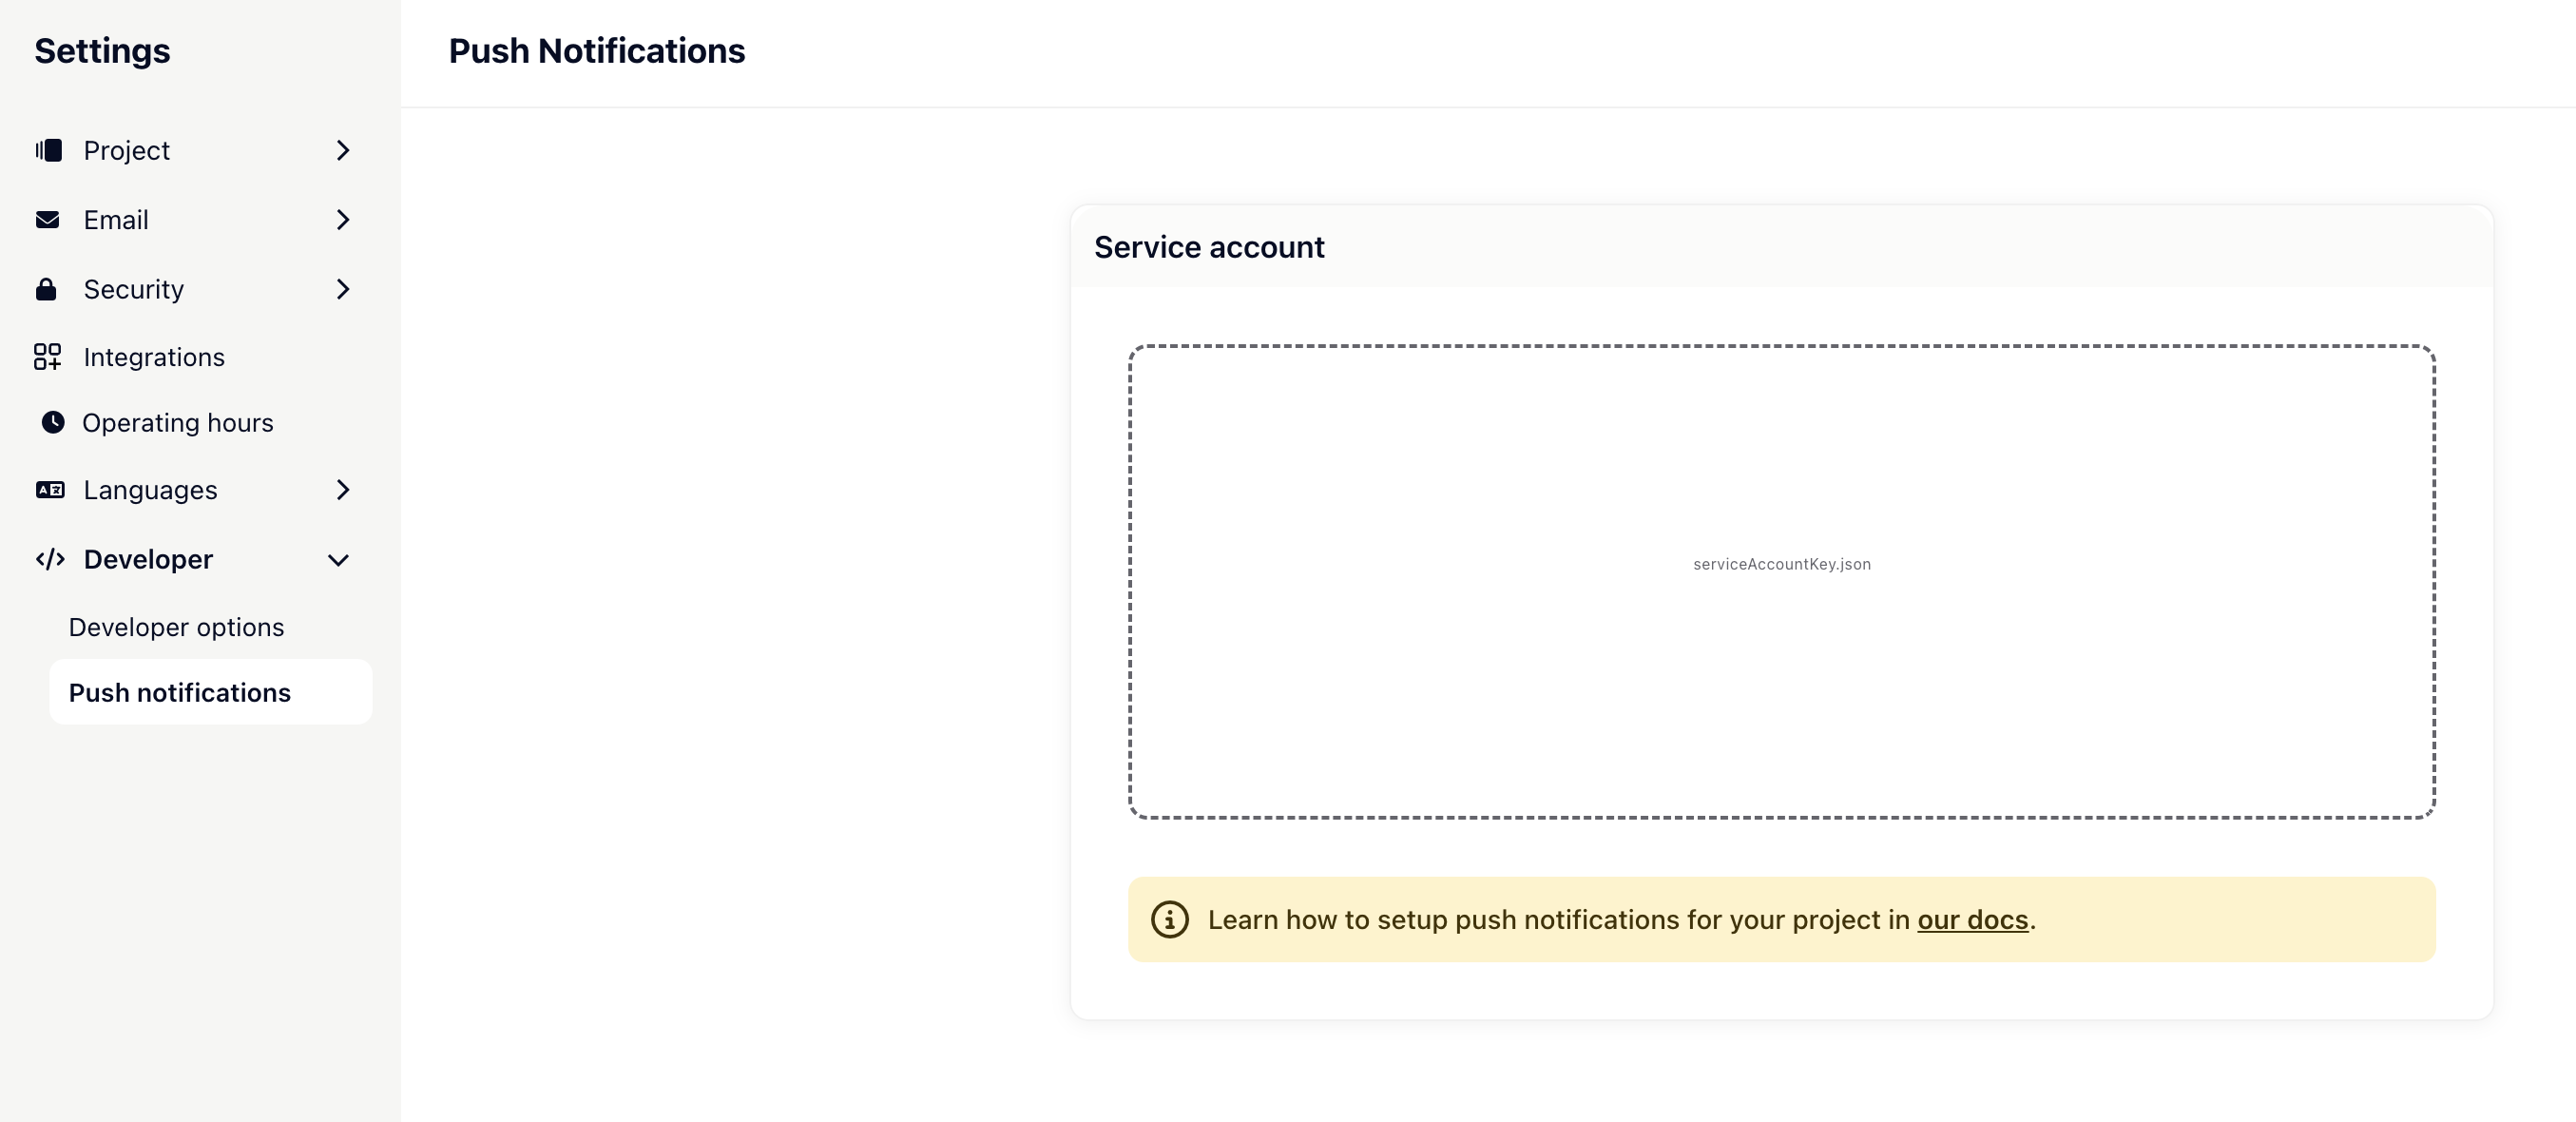
 Next, open the project settings in Gleap, select "Push Notifications", and upload the `serviceAccountKey.json` file. Finally, save your configuration.
 ## Subscribe to the Gleap user topic
The last step to complete the push notification setup is to subscribe to the user topic, which Gleap will send the push notifications to. In order to do so, you will need to register the register & unregister push message topic callbacks.
```js theme={null}
// Find more information here:
// https://rnfirebase.io/messaging/usage
Gleap.registerListener("registerPushMessageGroup", (topic) => {
messaging()
.subscribeToTopic(topic)
.then(() => console.log("Subscribed to topic!"));
});
Gleap.registerListener("unregisterPushMessageGroup", (topic) => {
messaging()
.unsubscribeFromTopic(topic)
.then(() => console.log("Unsubscribed from topic!"));
});
```
Register both listeners **before** calling `Gleap.initialize()`, so the initial topic registration isn't missed.
Gleap manages the topic lifecycle for you: `identify()` / `clearIdentity()` automatically emit `unregisterPushMessageGroup` for the previous topic and `registerPushMessageGroup` for the new one — you don't need to unsubscribe manually on sign-out.
## Push notification payload
Every push notification sent by Gleap carries a `data` payload with the following keys:
| Key | Value |
| -------- | ---------------------------------------------------------------------------------- |
| `sender` | Always `GLEAP` — use this to detect Gleap notifications. |
| `type` | `conversation` for chat messages. Other Gleap content uses `news` or `checklist`. |
| `id` | The reference to open — for `conversation` this is the conversation's share token. |
Outbound push campaigns send `type` and `actionId` instead of `id`.
The notification itself contains the sender's name in the title and a short plain-text preview (truncated to 70 characters) of the message as the body.
## Handle push-notification taps
When the user taps a Gleap notification, check for `sender === 'GLEAP'` and open the referenced content. When the app is launched from a killed state, wait for Gleap's `initialized` event before routing — otherwise the SDK may not be ready to open the conversation yet:
```js theme={null}
import messaging from "@react-native-firebase/messaging";
import Gleap from "react-native-gleapsdk";
const routeGleapPushNotification = (remoteMessage) => {
const data = remoteMessage?.data;
if (data?.sender !== "GLEAP") {
return;
}
if (data?.type === "conversation" && data?.id) {
Gleap.openConversation(data.id);
} else if (data?.type === "news" && data?.id) {
Gleap.openNewsArticle(data.id, true);
} else if (data?.type === "checklist" && data?.id) {
Gleap.openChecklist(data.id, true);
}
};
let gleapInitialized = false;
let pendingPushNotification = null;
// Register BEFORE Gleap.initialize().
Gleap.registerListener("initialized", () => {
gleapInitialized = true;
if (pendingPushNotification) {
routeGleapPushNotification(pendingPushNotification);
pendingPushNotification = null;
}
});
const handleGleapPushNotification = (remoteMessage) => {
if (gleapInitialized) {
routeGleapPushNotification(remoteMessage);
} else {
pendingPushNotification = remoteMessage;
}
};
// App opened from background by tapping a notification.
messaging().onNotificationOpenedApp((remoteMessage) => {
if (remoteMessage) {
handleGleapPushNotification(remoteMessage);
}
});
// App launched from a killed state by tapping a notification.
messaging()
.getInitialNotification()
.then((remoteMessage) => {
if (remoteMessage) {
handleGleapPushNotification(remoteMessage);
}
});
```
That's it - build and run your app 🚀
## Subscribe to the Gleap user topic
The last step to complete the push notification setup is to subscribe to the user topic, which Gleap will send the push notifications to. In order to do so, you will need to register the register & unregister push message topic callbacks.
```js theme={null}
// Find more information here:
// https://rnfirebase.io/messaging/usage
Gleap.registerListener("registerPushMessageGroup", (topic) => {
messaging()
.subscribeToTopic(topic)
.then(() => console.log("Subscribed to topic!"));
});
Gleap.registerListener("unregisterPushMessageGroup", (topic) => {
messaging()
.unsubscribeFromTopic(topic)
.then(() => console.log("Unsubscribed from topic!"));
});
```
Register both listeners **before** calling `Gleap.initialize()`, so the initial topic registration isn't missed.
Gleap manages the topic lifecycle for you: `identify()` / `clearIdentity()` automatically emit `unregisterPushMessageGroup` for the previous topic and `registerPushMessageGroup` for the new one — you don't need to unsubscribe manually on sign-out.
## Push notification payload
Every push notification sent by Gleap carries a `data` payload with the following keys:
| Key | Value |
| -------- | ---------------------------------------------------------------------------------- |
| `sender` | Always `GLEAP` — use this to detect Gleap notifications. |
| `type` | `conversation` for chat messages. Other Gleap content uses `news` or `checklist`. |
| `id` | The reference to open — for `conversation` this is the conversation's share token. |
Outbound push campaigns send `type` and `actionId` instead of `id`.
The notification itself contains the sender's name in the title and a short plain-text preview (truncated to 70 characters) of the message as the body.
## Handle push-notification taps
When the user taps a Gleap notification, check for `sender === 'GLEAP'` and open the referenced content. When the app is launched from a killed state, wait for Gleap's `initialized` event before routing — otherwise the SDK may not be ready to open the conversation yet:
```js theme={null}
import messaging from "@react-native-firebase/messaging";
import Gleap from "react-native-gleapsdk";
const routeGleapPushNotification = (remoteMessage) => {
const data = remoteMessage?.data;
if (data?.sender !== "GLEAP") {
return;
}
if (data?.type === "conversation" && data?.id) {
Gleap.openConversation(data.id);
} else if (data?.type === "news" && data?.id) {
Gleap.openNewsArticle(data.id, true);
} else if (data?.type === "checklist" && data?.id) {
Gleap.openChecklist(data.id, true);
}
};
let gleapInitialized = false;
let pendingPushNotification = null;
// Register BEFORE Gleap.initialize().
Gleap.registerListener("initialized", () => {
gleapInitialized = true;
if (pendingPushNotification) {
routeGleapPushNotification(pendingPushNotification);
pendingPushNotification = null;
}
});
const handleGleapPushNotification = (remoteMessage) => {
if (gleapInitialized) {
routeGleapPushNotification(remoteMessage);
} else {
pendingPushNotification = remoteMessage;
}
};
// App opened from background by tapping a notification.
messaging().onNotificationOpenedApp((remoteMessage) => {
if (remoteMessage) {
handleGleapPushNotification(remoteMessage);
}
});
// App launched from a killed state by tapping a notification.
messaging()
.getInitialNotification()
.then((remoteMessage) => {
if (remoteMessage) {
handleGleapPushNotification(remoteMessage);
}
});
```
That's it - build and run your app 🚀