> ## Documentation Index
> Fetch the complete documentation index at: https://docs.gleap.io/llms.txt
> Use this file to discover all available pages before exploring further.
# Custom actions
*Tags*: JavaScript, React, Vue, Angular, Website, Web App
We know that the built in actions (Bug Reporting, Feature Requests, Ratings & Contact Us) might not be enough for certain use cases. For these situations we offer custom actions, which allow you to start any custom action by code.
## Configure a custom action
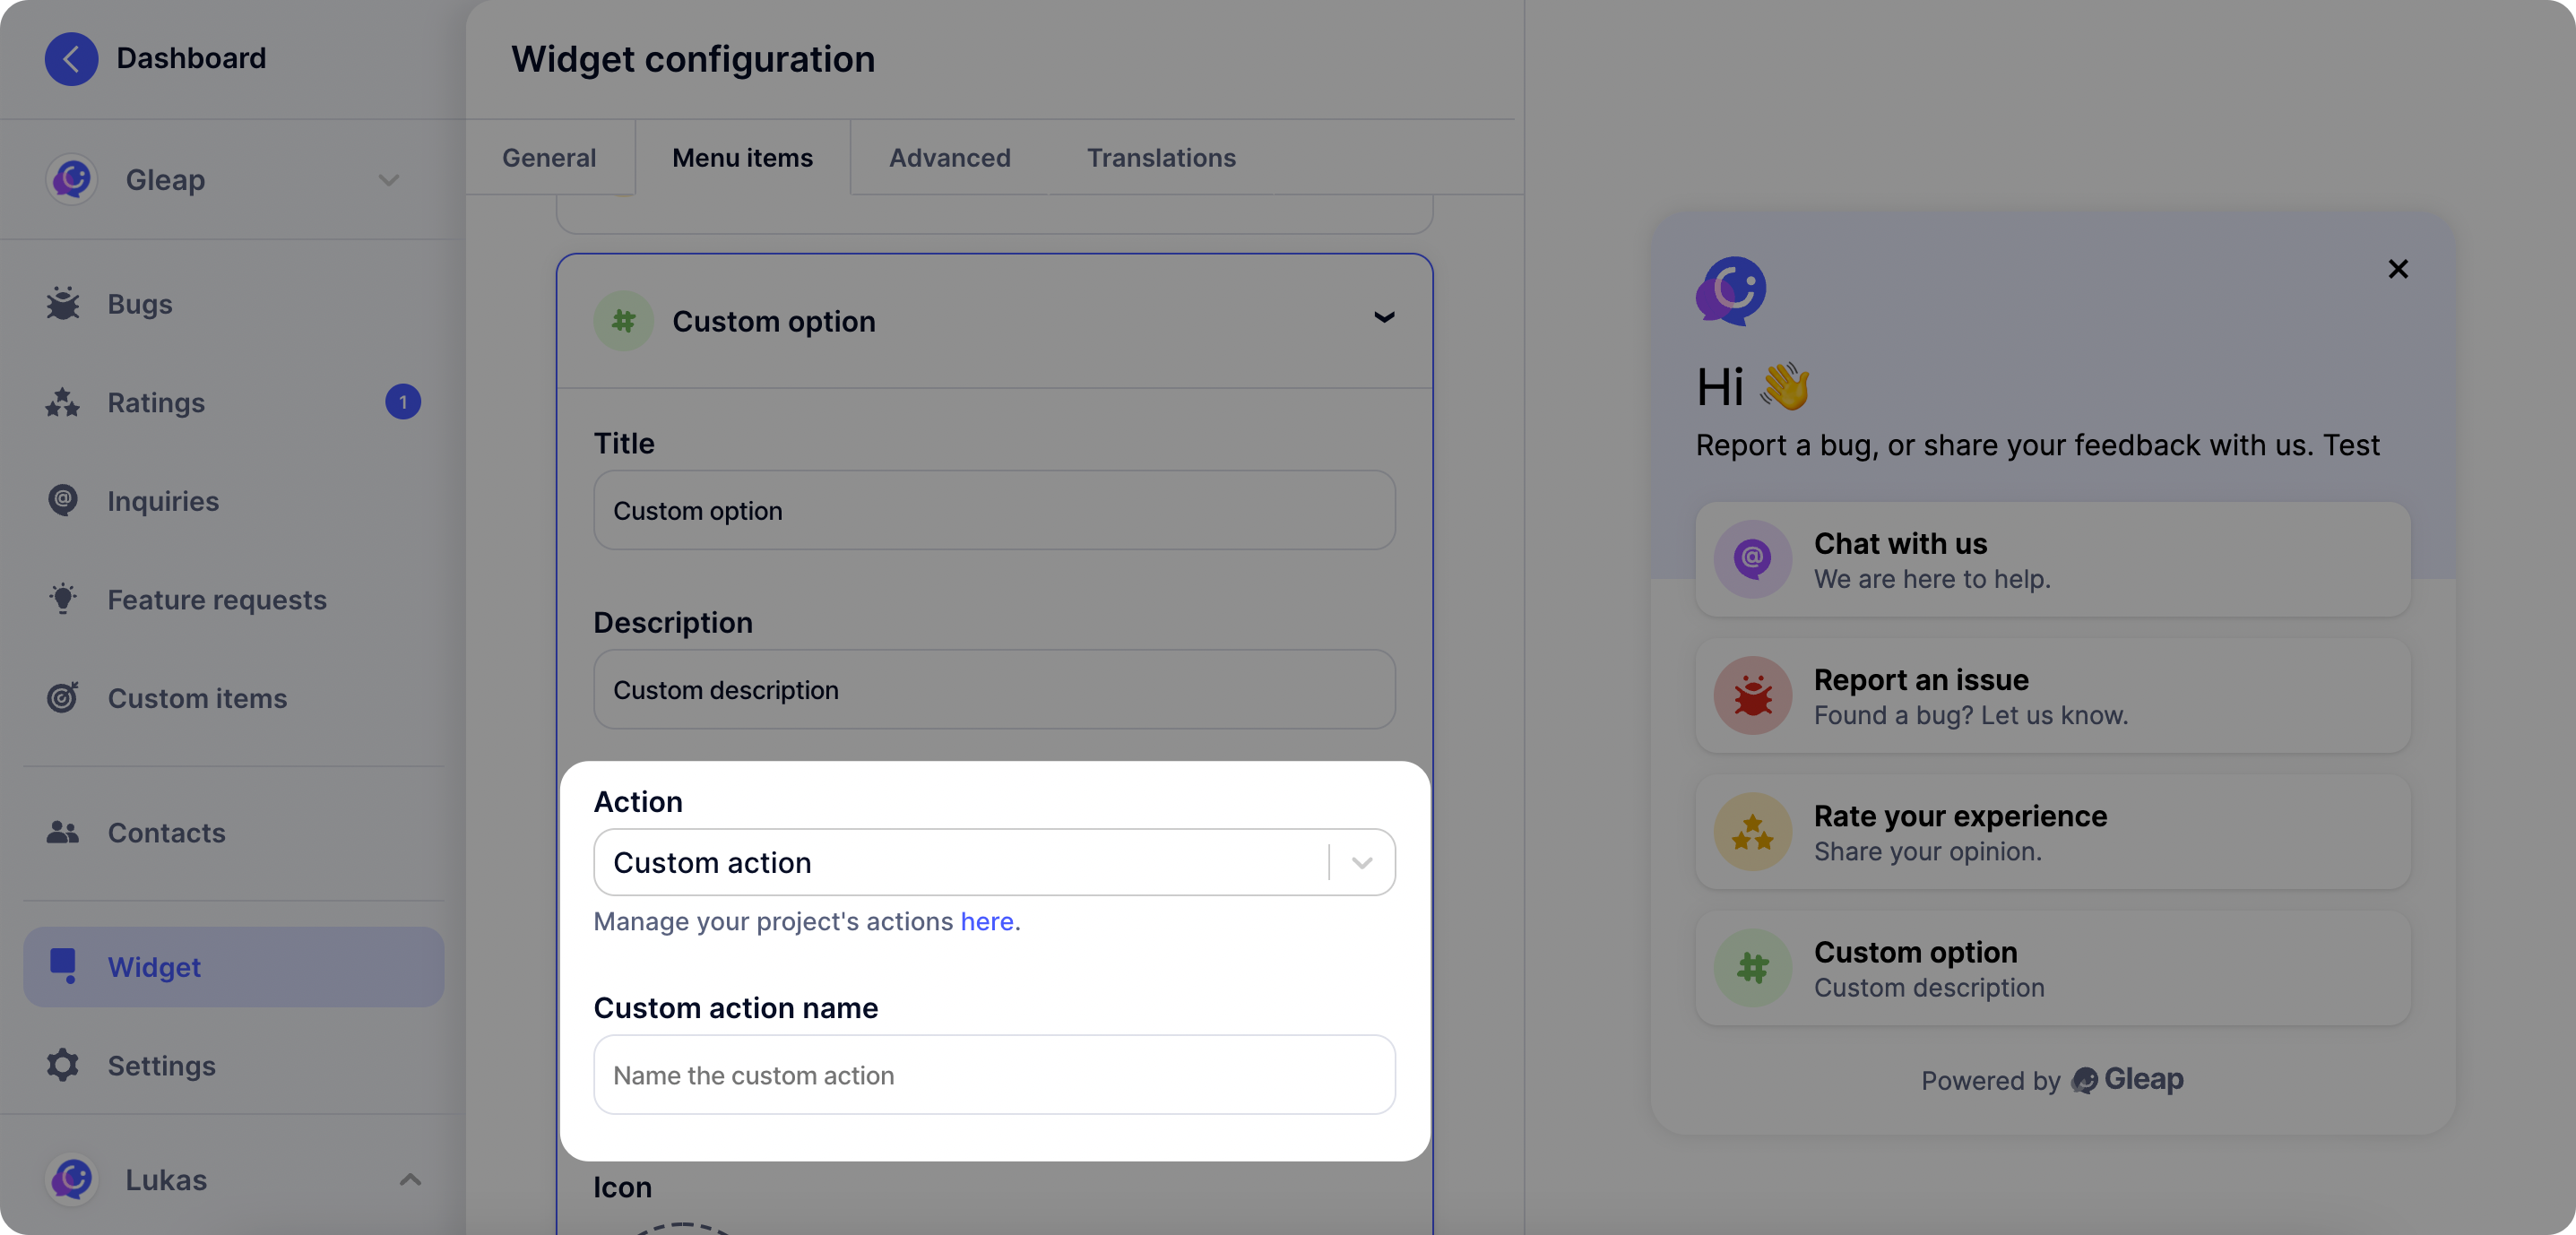
The first step with custom actions is to open the visual widget configurator and select **"Custom action"** as action type.
Now you need to **set a name for your custom action**. Choose any name you like (it's however important that this name matches the name you check in the next step).
 ## Custom action callback
Once you set a custom action in the Gleap dashboard, it will be called automatically on selection through the user. In order to perform custom code, simply listen for custom actions by using the `registerCustomAction` method.
If you use multiple custom actions, we suggest you check the triggered custom action's name in order to find out which custom action got triggered.
```javascript theme={null}
Gleap.registerCustomAction((customAction) => {
// For custom actions triggered within tickets, customAction.shareToken will be set to identify the ticket.
if (customAction.name === "MAGIC_ACTION") {
alert("It's magic!");
}
});
```
The **custom action name** is defined by you in the visual widget
configurator.
## Custom action callback
Once you set a custom action in the Gleap dashboard, it will be called automatically on selection through the user. In order to perform custom code, simply listen for custom actions by using the `registerCustomAction` method.
If you use multiple custom actions, we suggest you check the triggered custom action's name in order to find out which custom action got triggered.
```javascript theme={null}
Gleap.registerCustomAction((customAction) => {
// For custom actions triggered within tickets, customAction.shareToken will be set to identify the ticket.
if (customAction.name === "MAGIC_ACTION") {
alert("It's magic!");
}
});
```
The **custom action name** is defined by you in the visual widget
configurator.